With the move from Edge Legacy to Edge Chromium, there are fewer reasons than ever to use a third-party browser on Windows 10. Edge boasts the reliability of Google’s dominant Chrome (and can even use extensions from its store), but with the organizational control expected from Microsoft. Additionally, legacy web apps that depend on Internet Explorer can run within the browser using IE Mode – think ActiveX controls. Another reason to use Chromium over third-party offerings is improved support for features such as Azure AD Conditional Access, and administrative control over the synchronization of profiles.
Despite being so suitable for businesses as their browser of choice, Edge Chromium, much like OneDrive for Business (which I wrote about in this article), needs some configuration to get it right. Without proper configuration the user will have questions about new tabs layouts, syncing, etc. The browser will also be exposed and vulnerable to the installation of potentially unsafe extensions. Instead, use policies that grant IT control and reduce user friction.
In this article, I’ll explain the different Intune Administrative Templates recommended to make your users’ first run of Edge smooth and appropriate for the enterprise. With these policies, Edge will:
- Automatically sign in to an Edge profile with the user’s Azure AD account.
- Automatically synchronize things such as favorites and extensions.
- Automatically import supported data from another/default browser.
- Have a different search engine than the default (Bing).
- Have websites added as favorites automatically
- Not create a desktop shortcut (useful if you sync/redirect the desktop)
- Not allow users to install unapproved extensions.
- Generally de-consumerize, with the removal of the Microsoft News tab, shopping coupons, and saved passwords.
Although this article focuses on using Intune to apply these settings, Administrative Templates are backed by the same type of XML as Group Policy, so you could potentially use a Group Policy Object to apply these to non-MDM managed devices.
Create a Configuration Profile
A Configuration Profile is a collection of Intune settings, managed in Microsoft Endpoint Manager. You must create an Administrative Template-based Configuration Profile to deploy Edge settings to your Intune-managed devices. If you need some pointers on where to set these up, refer to my article on OneDrive for Business settings.
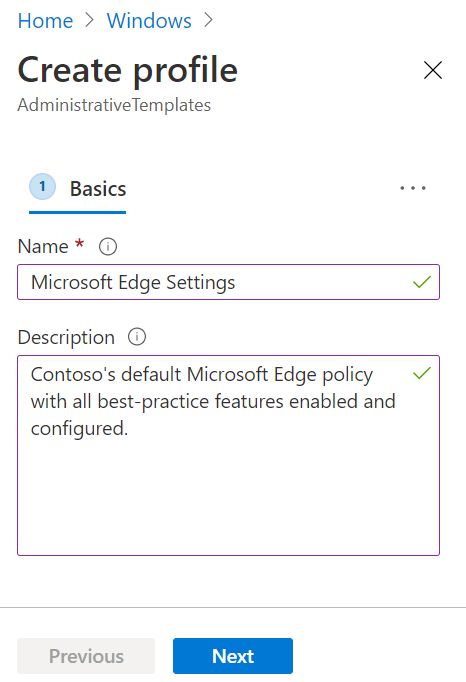
You’ll see a page with settings divided into Computer Configuration and User Configuration. This means that a setting will apply to all users that login to that device or the setting will follow the user regardless of which device they sign in to. You can also go into All Settings, and search for “Edge.” The Setting type and Path folders will give you more insight into if they apply to a user or group and, in the case of Edge, if the settings can be changed by the user later on (“users can override”). You may want to choose that path if it’s a setting you are comfortable with users customizing.

Now, onto the settings we’ll need to configure to achieve the results described earlier. Each setting within Administrative Templates and its consequences is noted, as some settings are not as simple as ‘enabled’ or ‘disabled.’ After configuring the setting, click ‘OK’ in the pop-up window to save your changes.
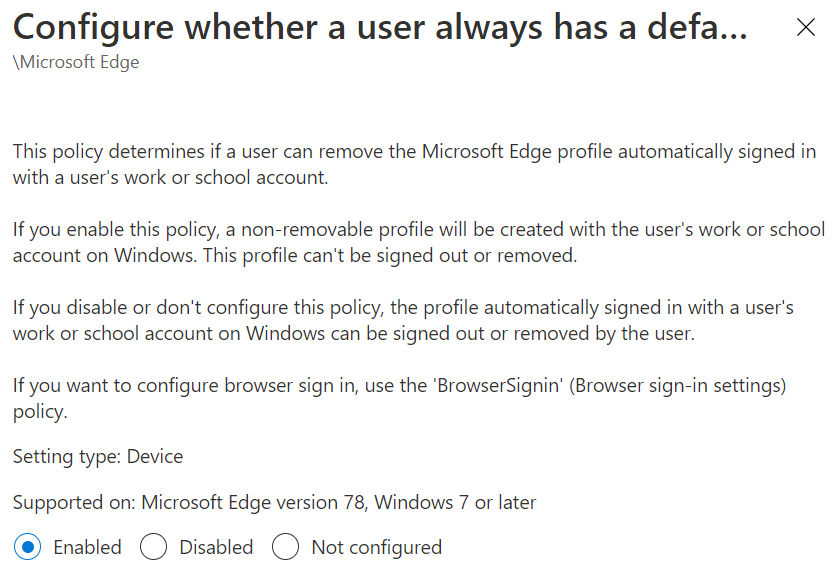
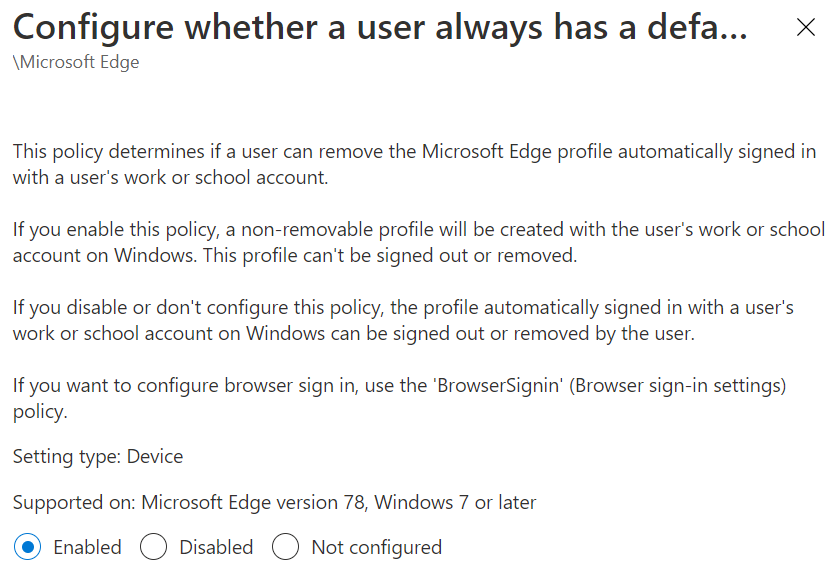
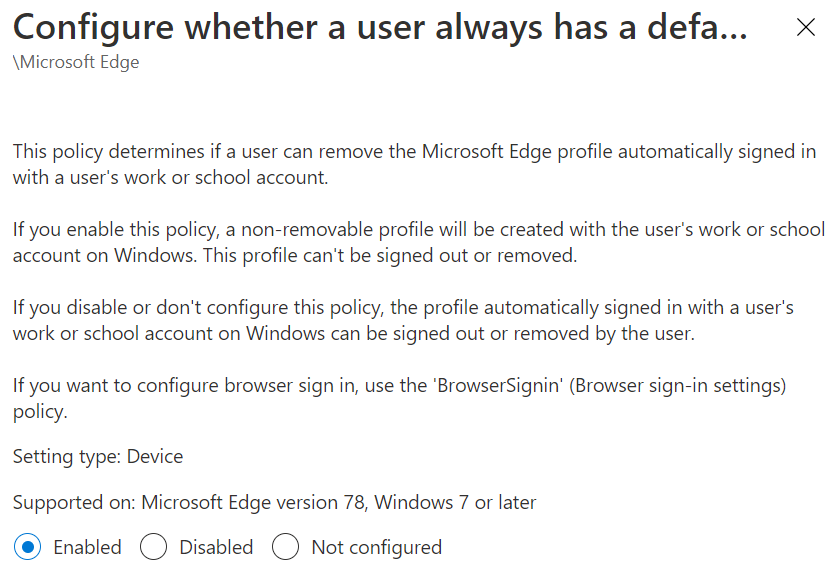
Configure whether a user always has a default profile automatically signed in with their work or school account
Choose ‘Enabled.’
This setting will create an Edge profile signed in as the user’s Azure AD account, which cannot be removed. This setting allows for Single Sign-on (SSO) and enables the synchronization of Edge settings, which we’ll configure in the next setting.
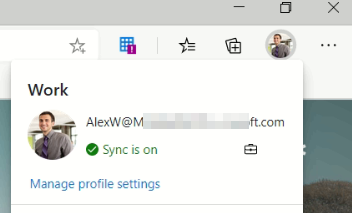
Now when a user launches Edge, their Azure AD account will have created an Edge profile called ‘work.’ Note the briefcase icon; this is indicative that the element is managed by the organization. You will see that briefcase in almost all places where an MDM policy controls the setting (they can all be viewed by going to edge://policy in the address bar)
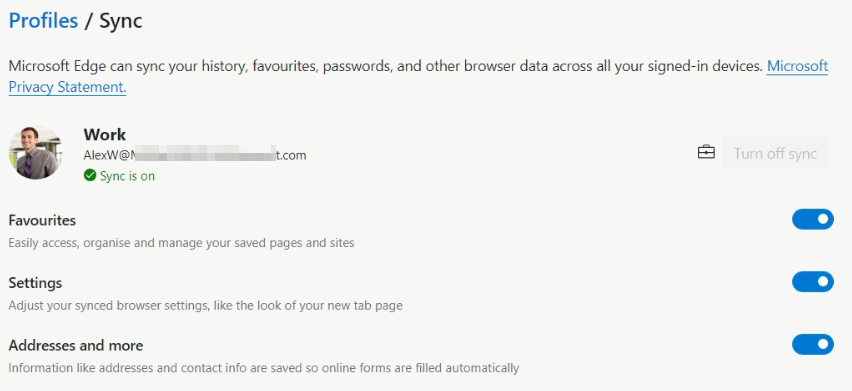
Force synchronization of browser data and do not show the sync consent prompt
Choose ‘Enabled.’
When you set up forced synchronization for the signed-in profile, sync for all supported data types is enabled. There are some important things to note about Edge sync. With the move away from Legacy Edge, sync is managed independently from Enterprise State Roaming, the Windows 10-orientated sync technology Edge Legacy used. This means synchronized data is available across all operating systems Edge can be installed on, such as macOS. You also must have Azure Information Protection (AIP) enabled on your tenant, as this is the technology used to encrypt the data at rest (AES 256) in the same location as your tenant is registered. So if you are using a licensing subscription without AIP for the tenant, you may not be able to use sync.
When a user goes into their Edge settings, they will be informed that sync is enabled by their organization.

Although the sync in its entirety is disabled with the option greyed out, they can continue into the settings for sync and choose the individual options, effectively allowing them to disable everything anyway.
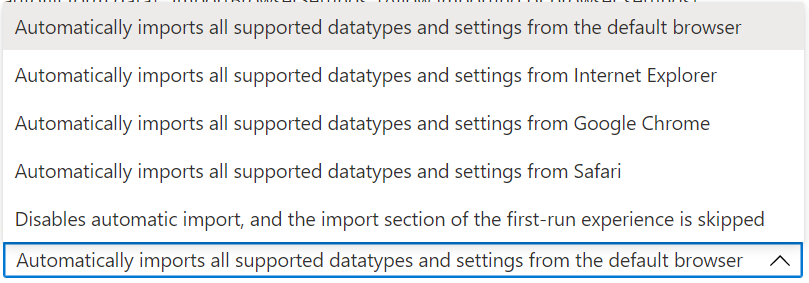
Automatically import another browser’s data and settings at first run.
Choose ‘Enabled’ with the setting Automatically imports all supported datatypes and settings from the default browser.
Although I recommend importing from the default browser, you can choose a specific browser. On Windows 10, you can import from Chrome or Internet Explorer straight into Edge (Legacy Edge always imports, so no setting for that here). However, an import from Firefox is possible by Group Policy, but not Intune (at the time of writing).
Ultimately, what imports depends on the browser. For example, Chrome allows the import of extensions and cookies, but Internet Explorer does not. The import runs during the First Run Experience, so if a user is already up and running with Edge (not Legacy Edge), this setting has no consequence.
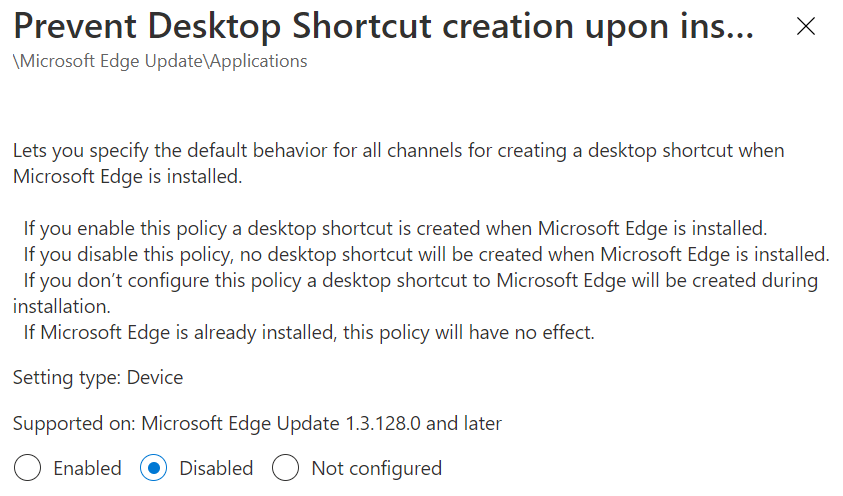
Prevent Desktop Shortcut creation upon install default
Choose ‘Disabled.’
This feature is self-explanatory, and I’ve included it to keep things consistent. Interestingly (or more accurately: frustratingly), the value you choose goes against established ADMX practice, and you must select ‘Disabled‘ to prevent the shortcut. You’ll find shortcut settings in five different Administrative Template paths, all of which relate to the various Edge channel updates, such as the preview releases. I’d recommend choosing the setting in path\Microsoft Edge Update\Applications as this will apply to all channels.
Enable the default search provider
Choose Enabled.
Enabling the default search provider is a prerequisite for configuring an alternative default if you prefer an option other than Bing which, we’ll do in the next setting. This setting also controls whether or not a user can search using the address bar. For example, if we chose Disabled and the user entered anything other than a web address in the address bar, it would not load. This setting, along with other search settings we’ll be controlling, is available in the “users can override path.” This way, you can control the search settings the user may want to change after the fact.
Default search provider search URL
Choose Enabled and a value for your preferred search engine.
When you are configuring this setting, you will be given the search URLs for Bing and Google, and whichever you choose becomes the default search. At the moment, for Google, this is:
{google:baseURL}search?q={searchTerms}&{google:RLZ}{google:originalQueryForSuggestion}{google:assistedQueryStats}{google:searchFieldtrialParameter}{google:searchClient}{google:sourceId}ie={inputEncoding}
So, simply copy that value exactly into the bar. I expect other search engines will become available over time, or you could look into settings for others on your own.

Default search provider URL for suggestions
Choose Enabled and a value for your preferred search engine.
Just like in the last setting where we configured the default search engine, you’ll be given some search provider URLs to choose from. For Google, it’s currently:
{google:baseURL}complete/search?output=chrome&q={searchTerms}
Through this configuration, as the user types in the address bar they will see search suggestions provided by the engine that you chose. Alternatively, you could not configure or disable the setting to remove suggestions (though it will still show suggestions from sources such as history or favorites).

Default search provider name
Choose Enabled and enter free text to describe the search engine.
Without configuring this, if you configure the above settings for an alternative search engine, users will see the URL of the search engine rather than the name in any references. Therefore, enter a value such as “Google” to keep things user-friendly and tidy.

Configure favorites
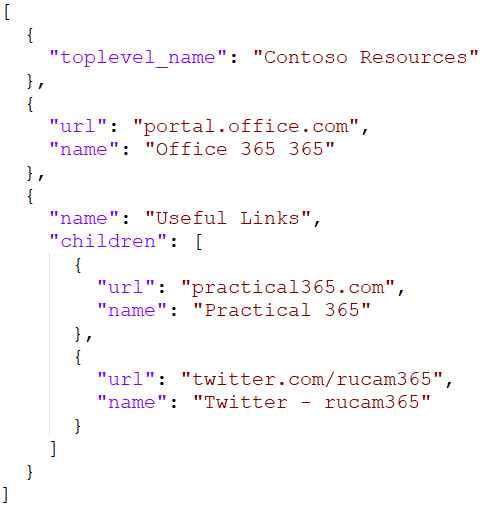
Choose Enabled and enter a JSON value (see below).
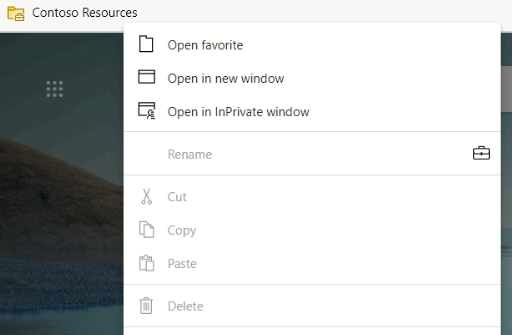
This setting creates managed favorites, which are favorites that aren’t synced but are locked – the user cannot remove them. You specify a folder name for these (“Contoso Resources” in the example), then a URL and a name. If you want child folders, see the structure for these by referring to the “Useful Links” in the example. When you have written your JSON code, paste it into the Configure favorites field on the page.

The JSON code results in the following appearing on the favorites bar, where you can see edit options are unavailable.

Control which extensions cannot be installed
Choose Enabled with the value *.
This, coupled with the next setting listed, will put Edge extensions into a deny-by-default mode. Extensions, powerful as they may be for allowing users to improve their experience, are a huge security risk. For example, Microsoft just had to remove 18 malicious Edge extensions for injecting ads into web pages.

As a result, when trying to install an authorized extension, the end-user will be informed that it is blocked by the Edge add-on repository. If trying to install from the Chrome web store, the user will see a ‘blocked by admin‘ button.


Allow specific extensions to be installed
Choose Enabled then the value of the extension ID(s).
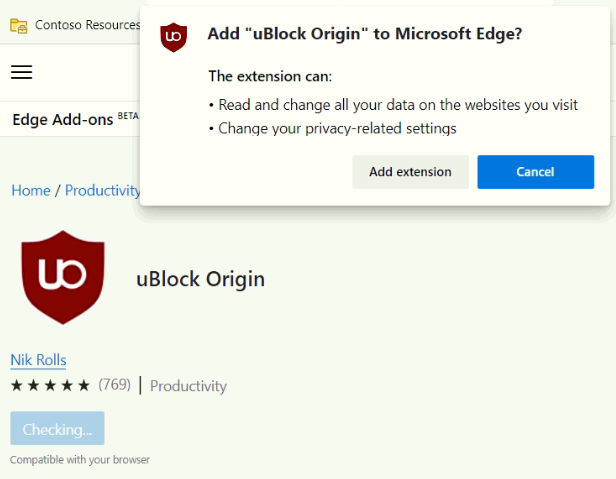
Enabling this process will allow some extensions to be installed by users, while others remained blocked by the last policy we set up. In the example here, we specify uBlock Origin’s ID to allow users to install it from the Microsoft Edge Add-ons store. Alternatively, we could use the policy Control (by which extensions install silently) to ‘force install’ tand prevent these extensions from being uninstalled. Extension IDs are obtained by referring to the URL of the extension in the store.

The end-user can now browse to the Edge Add-ons repository and get uBlock Origin. The end-user will have to approve the extension’s rights, which is why you may want to install silently. By doing that, it automatically approves the extension rights and becomes available to the user.
Hide the First-run experience and splash screen
Choose Enabled.
Enabling this setting removes the splash screen a user would typically see the first time they open Edge, which asks the user for settings such as new tab selection, logging into an account, and sync settings. To improve their experience and keep things consistent for all users, we configure these on their behalf with other settings.
Configure the Microsoft Edge new tab page experience
Choose Enabled and Office 365 feed experience.
By default, a new tab will show Microsoft News, which is a consumer-focused experience reporting on politics and celebrity gossip. To keep things more appropriate for organizations and enterprises, choose Office 365 feed experience. Your users will then see items relevant to their job function, such as suggested SharePoint Online and OneDrive for Business files.
An important note on this setting: it will soon be replaced by a configuration change in Office 365 rather than via administrative templates. That’s penciled in for Edge version 90 and will be managed from the Org Settings page within the Microsoft 365 Admin Center.

Shopping in Microsoft Edge Enabled
Choose Disabled.
A cool feature for consumers, but not particularly appropriate for organization-owned devices, is that Edge will recommend coupons for certain shopping websites. This feature stops that, but like other settings, you can allow users to enable it again.
Enable saving passwords to the password manager
Choose Disabled.
This setting will prevent users from saving their passwords to Edge’s built-in password manager. There are a few reasons I like to do this, but the primary one is protecting the user from not contemplating the lifecycle of their data. If a user saves passwords for personal websites to Edge, this data is active as long as the Azure AD account is. For example: if a user leaves the organization and a member of the IT department resets their password and gains access to their Azure AD account, all those passwords are available to that member of the IT department.
Disabling saving passwords will not remove any already saved passwords, and you may want to configure the setting Allow importing of saved passwords to prevent other browsers’ saved passwords from getting in.
Deploy the Configuration Profile
With settings now configured, we need to assign them to Azure AD groups. Remember, if we have chosen to base our policies on users or devices, we must assign this Configuration Profile to the correct type of group. For more details on the scoping and assignment process, see my original blog on Administrative Templates.
Summary
When a user now signs into Edge for the first time, they will get a much more business-appropriate experience than they would out-of-the-box with default settings. You’ve introduced security controls around password saving and extensions, as well as productivity improvements by syncing their settings and automatic bookmarks.
There are a multitude of Edge policies configurable by Administrative Policies we’re not able to cram into this one article, and the Edge team keeps adding more with every release. It’s inevitable that minor glitches will show up, like the effect of sleeping tabs on SharePoint Online pages. Keep checking Practical365.com for more documentation and updates, and see what other relevant settings you can roll out.


We want to set a Google as the default search provider but let users change this if they want. Any way to do this?
Hey man, nice post!
Do you know how to allow Edge to download ZIP files?
I’m using with KIOSK Single APP mode.
Thank you