
In parts one and two of this series, we explained the principles of applying sensitivity labels at the container level in Microsoft 365 using SharePoint sites, Teams, and Microsoft 365 groups. We demonstrated that you can apply labels to both new and existing Sites, Teams, and Groups, and how Site, Group, or Team owners can easily change the labels at any time. We also explained the impact of setting sensitivity labels with a Private setting and it’s effect on guest members in Microsoft Teams.
In the third and final part of this blog series, we will discuss the impact of applying sensitivity labels at the container level, where document level label settings are also already in place. We will also show you some useful tips on the Microsoft 365 audit log auditing capabilities concerning sensitivity labeling.
Applying container level sensitivity labels where document level labeling is already in place
Now that we understand how container level sensitivity labeling works, an important point to consider is how this affects any documents within these containers? Do they inherit the container level label or retain their own label, will there be any conflict? Let’s take a look by taking the following steps.
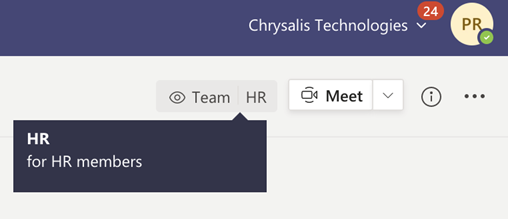
- In part two of this series, we created a team called Human Resources, and assigned a label to the Team called General \ HR (where General is the top-level label and HR is a sub-label). You can see the Team in the image below.

2. The following image shows the HR sub-label applied to the Team.
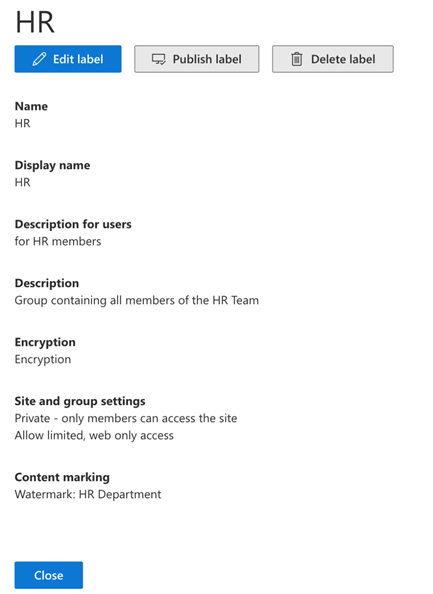
3. The settings of the HR sub-label are in the following image.
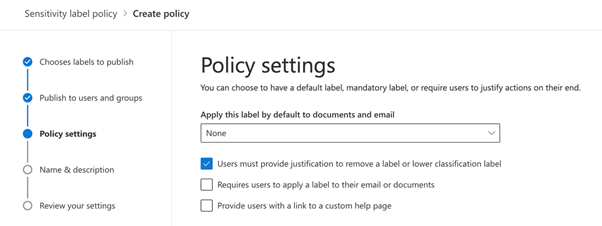
4. The label was published to target users with a Sensitivity label policy containing the settings shown below. These settings include a requirement for users to justify removing a label or setting a lower classification level. However, in this case, we set no default label.
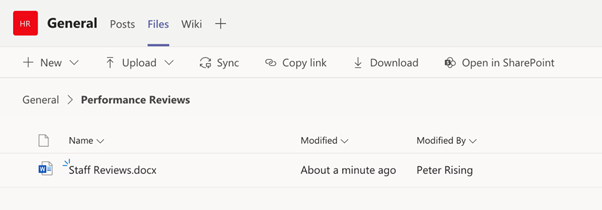
5. Within the Team, under the Files section, and a folder named Performance Reviews, we have a word document called Staff Reviews, as shown in the following image.
6. We can choose to set a sensitivity label to apply directly to the document on opening the document. The label selected in this instance is called Confidential.

7. Shortly after, the user who applied the label to the document will receive an email warning them saying the Incompatible sensitivity label has been detected, as shown below.
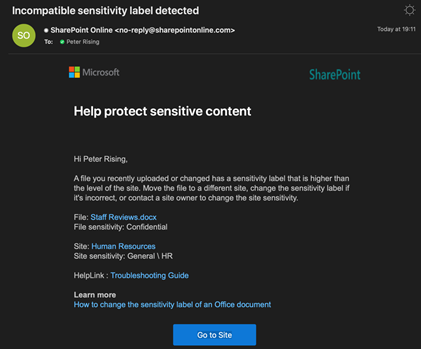
This means there has been a label mismatch detected by Microsoft 365 between the container level (in this case, the Teams SharePoint site) and the document level.
So, does this mean that the document label will now be changed to match the Team label? The answer to this is no! There is no setting to configure or enforce the inheritance of label settings from the container level down to the document level.
This email is merely a warning. The user may choose to ignore it if they are comfortable with the level of sensitivity they have applied to their document with the selected label or set the document label to match. The choice is entirely down to the user.
Important note – If we had chosen not to apply a label to the document, we wouldn’t have received a warning of the mismatch. We didn’t set a default label requirement in the label policy to be applied by our policy.
How can we gain further visibility of mismatches like these so that administrators may be alerted and act accordingly? We can do this by using the Microsoft 365 Audit log search feature.
Microsoft 365 Audit log search
Administrators may access the Microsoft 365 Audit log in the Security and Compliance Center. To interrogate the log, we need to complete the following steps.
- Log in to the Security and Compliance Center. You will need to be either a Global Administrator or be assigned the View-Only Audit Logs or Audit Logs role in Exchange Online to search the audit log. Then give these roles to the Organization Management and Compliance Management role groups.
Note – In older Microsoft 365 tenants, the audit log wasn’t enabled by default, so you may need to enable it for your tenant explicitly. You can find out how to turn on the audit log for your tenant here.
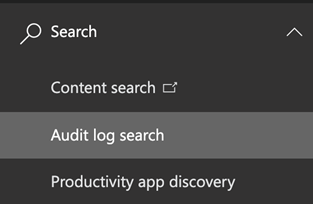
2. You may find the audit log within the Security and Compliance Center by navigating to Search > Audit log search, as shown below.
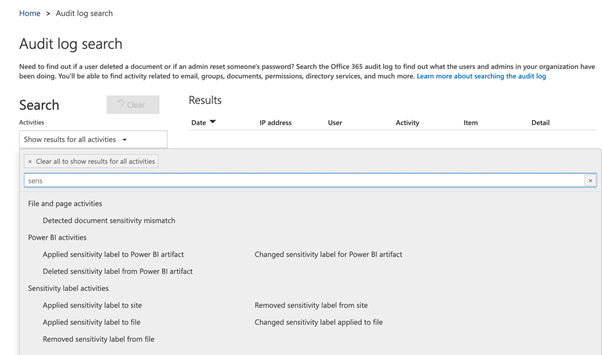
3. Within Audit log search, under Show results for all activities, type in Sensitivity. You will see the audit log search capabilities relating to sensitivity labeling there. We need to choose the option under File and page activities called Detected document sensitivity mismatch, as shown below.
4. Next, we can choose a date range for our audit log search. Please note that by default, the audit log will retain events for up to 90 days. This setting may be increased to a maximum of 365 days, but an E5 license is required to do this. We also can filter our results by the user or by file, folder, or site.
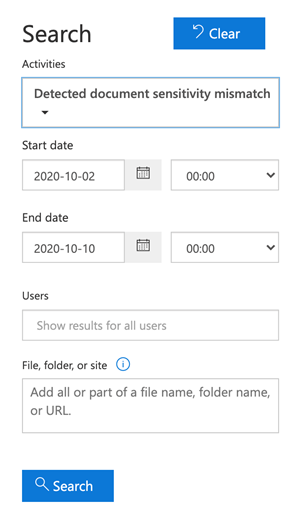
5. Click Search, and after a few moments, we will see the results. This example shows the mismatch detection in the audit log search results, as shown below.

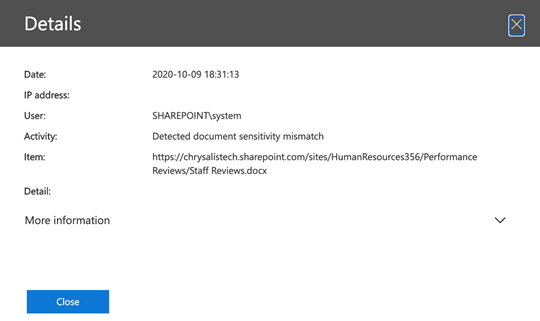
6. If we drill down, we can see some detail relating to the result.
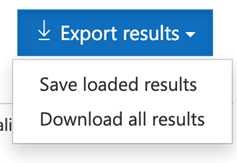
7. We can also export the results to a CSV file if we chose to do so.
8. The CSV is formatted, as shown below.

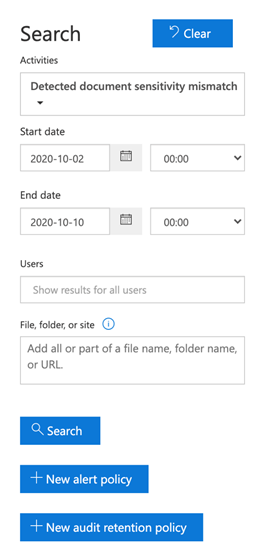
9. In addition to searching the audit log, we can also create alert policies based on our search results. This would be useful in this example to generate an email alert to an administrator whenever a label mismatch is detected. Alert policies relating to audit log searches may be created by choosing + New alert policy as shown in the following image.
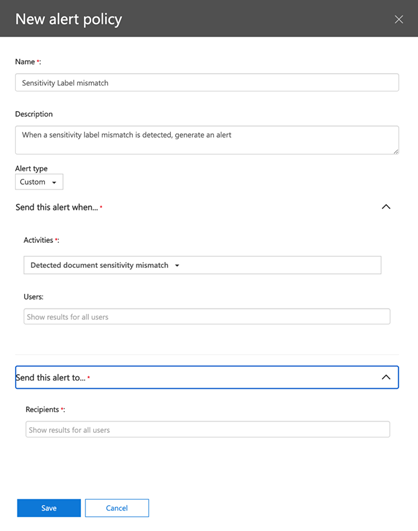
10. In the following example, we will create a new alert policy called Sensitivity label mismatch. Under Activities, the Detected document sensitivity mismatch is automatically selected for us. We can then choose to filter our alert policy to only report against specific users. Leaving this field blank will include all tenant users. We can then choose who we want to send the alert to before clicking to Save the policy.
11. To review or change your policy after saving it, you can navigate to Alerts > Dashboard in the Security and Compliance Center.
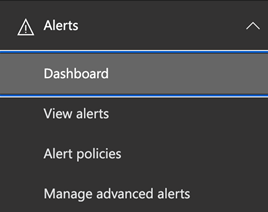
12. Click on Activity alerts.
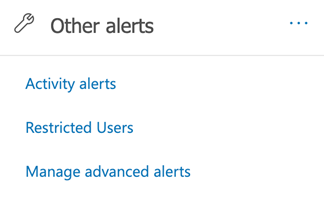
13. You will see the alert that you configured in the list, as shown in the image below.

Note – It is also possible to search the Microsoft 365 Audit log by using PowerShell, please refer to this Microsoft article for further information.
Summary
In this blog series, we have introduced you to the principles of applying sensitivity labels to containers within Microsoft 365, including SharePoint sites, Teams, and Microsoft 365 groups. We showed you that labels could be applied to these containers by editing existing containers or creating new ones.
We also explained that documents that reside within sites, teams, and groups do not inherit the sensitivity label, which is set at the container level. However, should there be a label mismatch detected by Microsoft 365, an email alert will be sent to the user who can choose to amend the label set on their document should they wish to do so.
Finally, we showed you how to access the Microsoft 365 audit log search from the Security and Compliance Center to detect sensitivity label mismatches and set up alert policies based on your audit log searches.


Hi Peter,
I love the way you describe things and make them easy to your readers.
I learned a lot from this series but had one issue. I’m using, like you do, a label with a Watermark, but documents automatically labeled with that Label (because they are e.g., copied to the Folder) do get the Label but the Watermark is not applied?
Is that the same in your environment? Did I do something wrong?
Greetings, Ludwig
Nice post. I have 2 questions:
1/ Is there a way to disable or edit the auto Microsoft email that is sent to the uploader when an “Incompatible sensitivity label” is detected?
2/ Is the only benefit in setting up a bespoke alert policy in this context of a mismatch, to alert a wider audience, not just the uploader of the ‘mismatch’ file via the automated message
thank you!
Hi, thanks for explanations!
How to find part 1 and part 2 of this article?
https://practical365.com/?s=Using+sensitivity+labels+with+SharePoint+sites%2C+Microsoft+Teams%2C+and+M365+groups
just search the site for the title and you get all the parts 🙂
Ha, thank you my friend! ?
I find your bio (below the article) disturbing , it is missing your MVP title 😛