Azure AD Doesn’t Store a Domain Name Property
I was asked if domain names can be used with adaptive scopes for user accounts. The reason for the request is that a tenant supports users with multiple domains for different operating companies. They want to apply specific retention processing to certain companies and thought that adaptive scopes could help. It’s a reasonable and logical request.
The simple answer is “no,” because Azure AD doesn’t maintain a property to hold a user’s domain name. Azure AD stores domain names in the user principal name (UPN) and email address (Mail) properties. However, Azure AD doesn’t split out the domain name part of the UPN or email address and stores it in a separate property. As such, the Microsoft Purview compliance portal doesn’t support a method to select a domain name as a filterable property, so adaptive scopes won’t work.
The same issue surfaces with custom recipient filters for dynamic distribution lists. Microsoft supports a much wider set of filterable properties for dynamic distribution lists than is available for adaptive scopes, but domain names don’t feature there either. It seems like filtering based on the domain part of an email address would be useful, but when I asked about this omission in the past, Microsoft said that complex processing is needed to extract and index the domain names. The same issue probably exists for adaptive scopes.
Custom Attributes are the Solution
To solve the problem, we need to use a property of user accounts available to adaptive scopes. Azure AD supports fifteen customizable single-value attributes. It’s easy to update these attributes with domain names using Exchange Online cmdlets. Here’s what I did to find all user mailboxes and write the domain name for the account’s user principal name into custom attribute 8:
[array]$Mbx = Get-ExoMailbox -RecipientTypeDetails UserMailbox -ResultSize Unlimited -PropertySets Custom
ForEach ($M in $Mbx)  {
    $UserDomain = $M.UserPrincipalName.Split("@")[1]
    If ($UserDomain -ne $M.CustomAttribute8) {
      Set-Mailbox -Identity $M.UserPrincipalName -CustomAttribute8 $UserDomain }
}
Checking the set of accounts with a certain domain name is done as follows:
Get-ExoMailbox -Filter {CustomAttribute8 -eq "Office365itpros.com"} -Properties CustomAttribute8 | Sort-Object DisplayName | Format-Table DisplayName, UserPrincipalName, CustomAttribute8
Updating Custom Attributes with the Graph SDK
You might wonder why I use the Get-ExoMailbox and Set-Mailbox cmdlets to update the custom attribute. The Get-MgUser and Update-MgUser cmdlets from the Microsoft Graph PowerShell SDK will also do the job, but they are more unwieldy. Here’s the equivalent code to find user accounts (the filter finds licensed accounts) and update the custom attribute with the domain from each account’s user principal name:
[array]$Users = Get-MgUser -Filter "assignedLicenses/`$count ne 0 and userType eq 'Member'" -ConsistencyLevel eventual -CountVariable Records -All
ForEach ($User in $Users) {
     $UserDomain = $User.UserPrincipalName.Split("@")[1]
     If ($UserDomain -ne $User.onPremisesExtensionAttributes.ExtensionAttribute8) {
      Update-MgUser -UserId $User.Id -OnPremisesExtensionAttributes @{'extensionAttribute8' = $UserDomain}
     }
}
This code fetches the same set of user accounts and lists the display name and custom attribute 8 for each account. Don’t run this immediately after performing the updates as you’ll probably not see the domain name in custom attribute 8. Let Graph caching work and wait a moment or so before checking.
[array]$Users = Get-MgUser -Filter "assignedLicenses/`$count ne 0 and userType eq 'Member'" -ConsistencyLevel eventual -CountVariable Records -All

$Users | Where-Object {$_.UserPrincipalName -Like "*Office365itpros.com"} | Select-Object DisplayName,onPremisesExtensionAttributes -ExpandProperty onPremisesExtensionAttributes | Format-Table DisplayName, ExtensionAttribute8
Updating a custom attribute in user accounts with a value used for something like an adaptive scope needs to happen periodically. An Azure Automation runbook is a good choice for making sure that new accounts and accounts that change their user principal name have the correct value in the custom attribute. Both the Exchange Online management module and the Microsoft Graph PowerShell SDK support Azure Automation-managed identities to make the scheduled jobs even more secure.
Cybersecurity Risk Management for Active Directory
Discover how to prevent and recover from AD attacks through these Cybersecurity Risk Management Solutions.
Creating an Adaptive Scope
After making sure that accounts have the correct values in the custom attribute, we can create an adaptive scope. Microsoft Purview supports adaptive scopes for users and groups and for SharePoint sites. Adaptive scopes for users and groups depend on Azure AD properties to find targeted objects, so that’s the type we use.
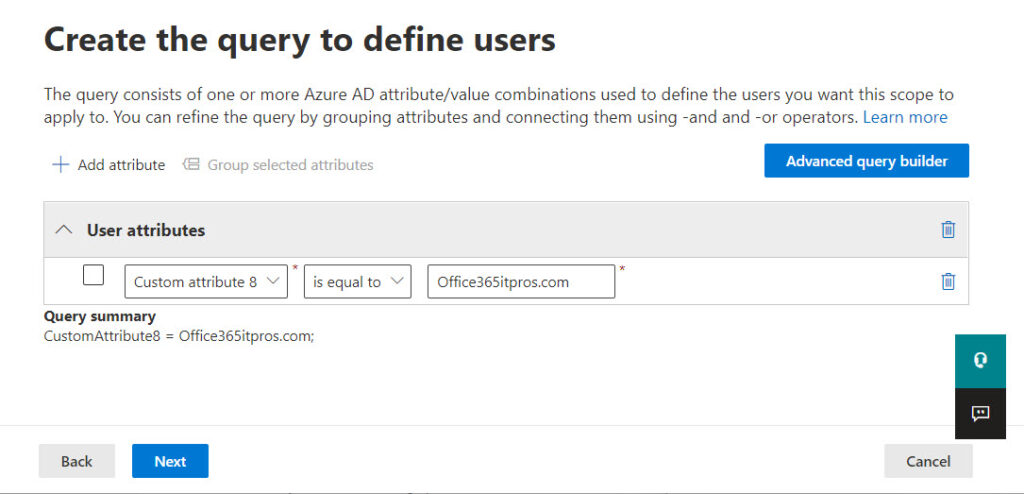
The scope query is where the magic happens. In this case, the query is simple – match any user account that has a certain domain name in custom attribute 8. Figure 1 shows what the scope query looks like in the Purview portal.

The advantage of an adaptive scope is that it keeps pace with changes made to user accounts. In this instance, the scope query will handle situations such as when an organization updates the user principal names for a set of users because of company restructuring or another reason.
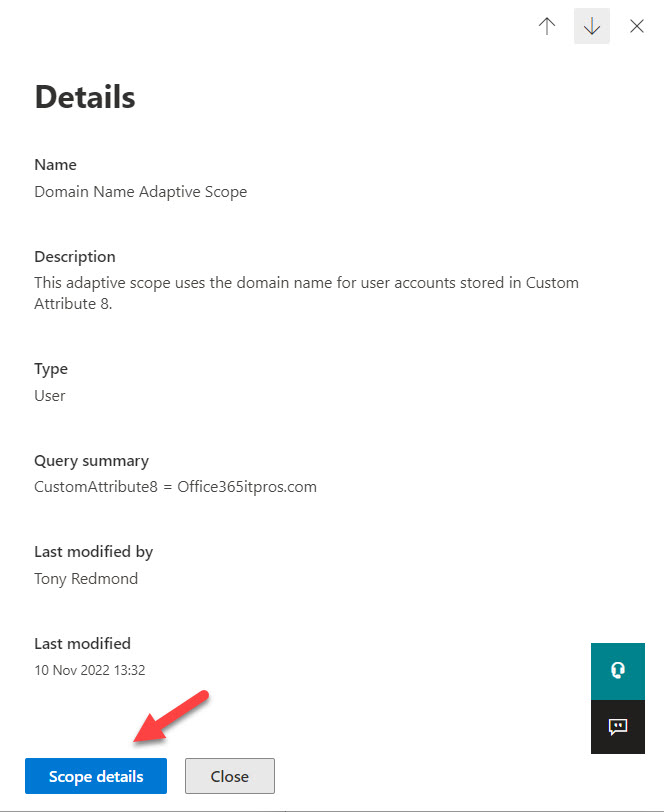
Working with an adaptive scope is an exercise that requires time and patience. After you create the adaptive scope, a background process resolves the scope query to determine the target set of accounts. You can’t control when the background process runs. All you can do is wait for at least a day and then check if any results are available. Select the adaptive scope and select Scope details (Figure 2).

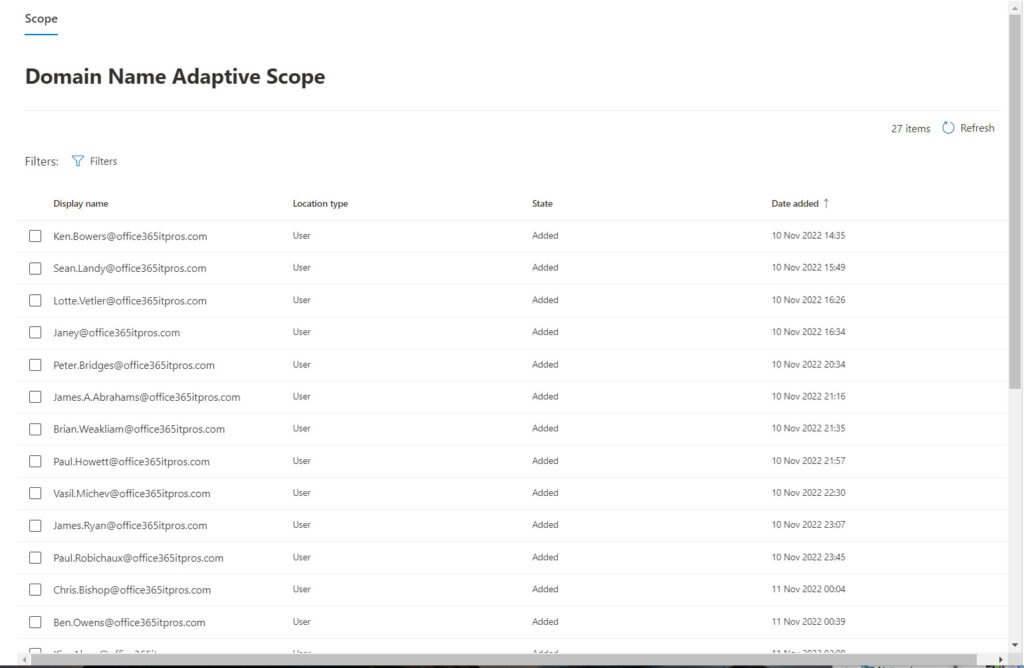
This action prompts Purview to open a new browser tab to display the set of objects identified by the scope query. If you see “No data available,” you know that the background process hasn’t run – or that it has, and the scope query didn’t find any objects. Hoping that the former is the case, close the screen and wait another day before checking again.
It’s important to remember that query results might appear in batches. In other words, you check and find that some of the expected mailboxes are there, but not all. Waiting for a few more hours might show that the scope query has found some more mailboxes. Eventually, the scope query finishes its search and Purview lists a complete set of mailboxes (Figure 3). You can compare the results shown by Purview against the set retrieved by PowerShell. Ideally, the two sets should match. If they don’t, the processing of the scope query might not be complete, or the query is incorrect.

Create a Retention Policy
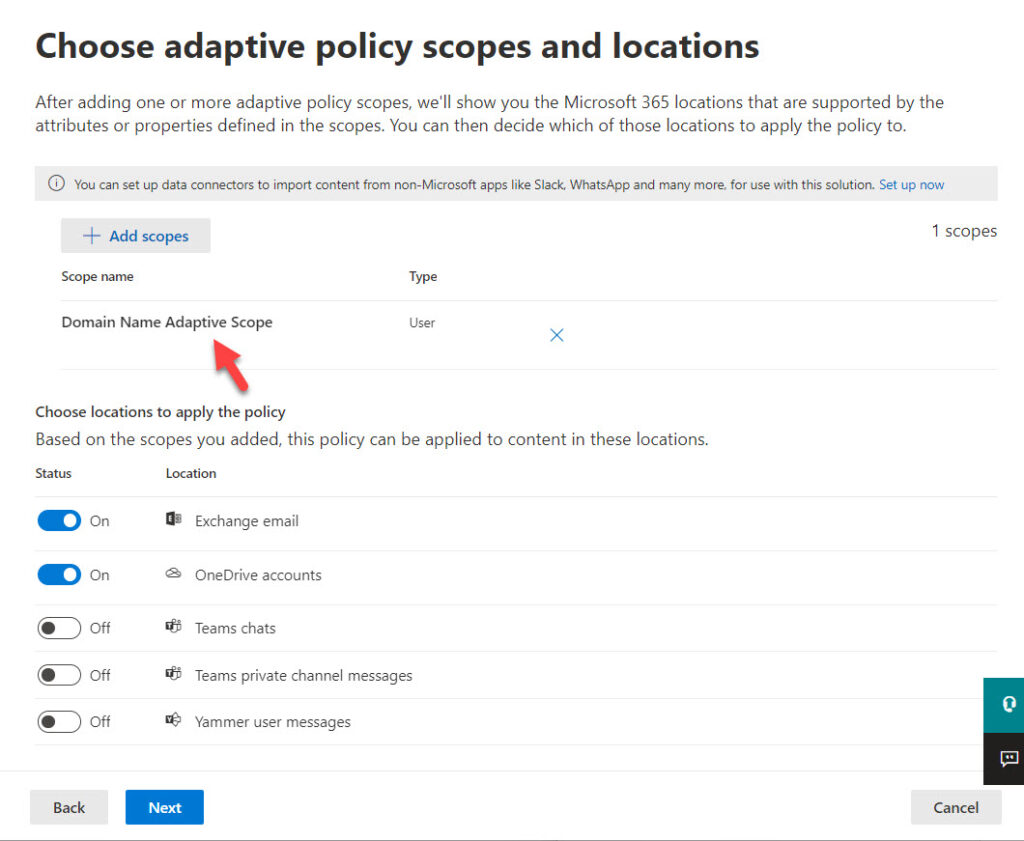
When you are happy that the scope query finds the correct set of user accounts, you can go ahead and create a new Microsoft 365 retention policy and use the adaptive scope. Figure 4 shows settings for a retention policy with the adaptive scope selected to process items in Exchange Online mailboxes and OneDrive for Business accounts.

E5 Licenses Required for Adaptive Scopes
Remember that the use of adaptive scopes requires Office 365 E5 or Microsoft 365 E5 compliance licenses. If you don’t have these licenses, it’s possible to use PowerShell to update the locations for a static retention policy with the details of users for a specific domain. For example:
Set-RetentionCompliancePolicy -Identity "Office 365 IT Pros Retention Policy" -AddExchangeLocation "Peter.Bridges@office365itpros.com"
As discussed earlier, an Azure Automation runbook is a good method to assign user accounts with the relevant value for the custom attribute. The same runbook could easily include code to update a retention policy. In this instance, the retention policy has a static scope, meaning that Purview doesn’t automatically update the locations under the control of the policy using an adaptive scope. Instead, the policy locations remain static until updated by an administrator (interactively or by running PowerShell).
Using an Azure Automation runbook means that you do more work to develop and maintain the PowerShell code, but you don’t need E5 licenses. All it takes is a little extra work to make sure that retention policies process the correct accounts.
Cybersecurity Risk Management for Active Directory
Discover how to prevent and recover from AD attacks through these Cybersecurity Risk Management Solutions.


